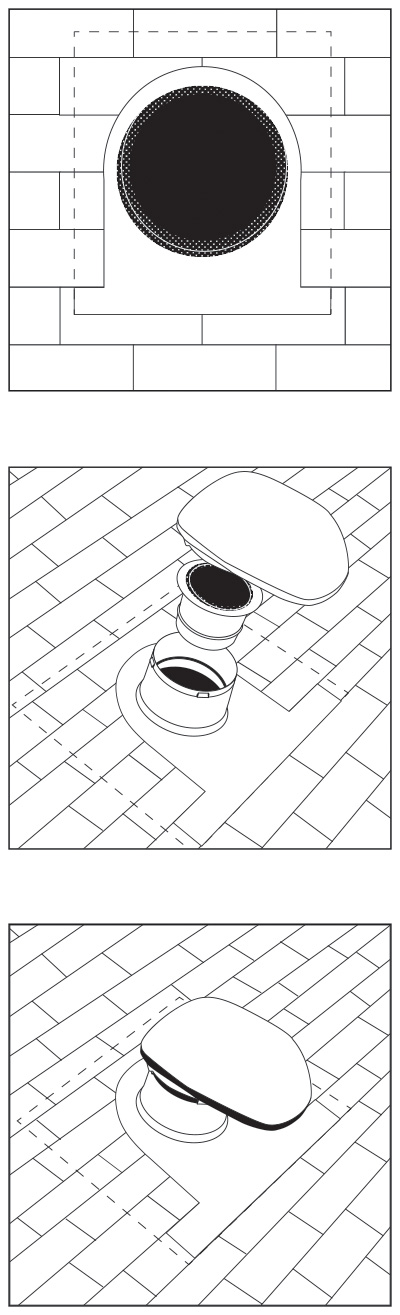
Installation Instructions
- Remove top housing to visually center bottom base housing over the vent hole.
- Cut or trim shingles, tiles or roofing as needed for proper centering over vent hole.
- Install the upper/top section of the base flange under the shingles or roofing. Ensure the top leading edge of the base flange is NOT exposed or left undercover by the shingles or roofing.
- Overlap shingles or roofing on the upper/top base flange to ensure proper runoff past base flange cylinder.
- Bottom section of base flange should be installed on top of shingles or roofing for proper water runoff onto field of shingles or roofing.
- Secure the base flange to the roof with fasteners.
- Connect flex tube connector as needed to air ducting or flex tubing.
- Snap top vent housing onto the base housing.
- Do not install bath roof cap on roofs with 2/12 pitch or below.
- When installing on roofs that are 12/12 or greater or in high-wind areas, install fasteners or screws into the rim of top housing that installs onto the base housing.